Make your own decorative pillow. You will paint your own fabric and embellish it with stitching and beads. The class is on the schedule at Baron’s Sewing Center in Woodland Hills for Tuesdays January 14 and January 21st 2014
6 pm until 9 pm
(6 Hours total – 3 hours each day)
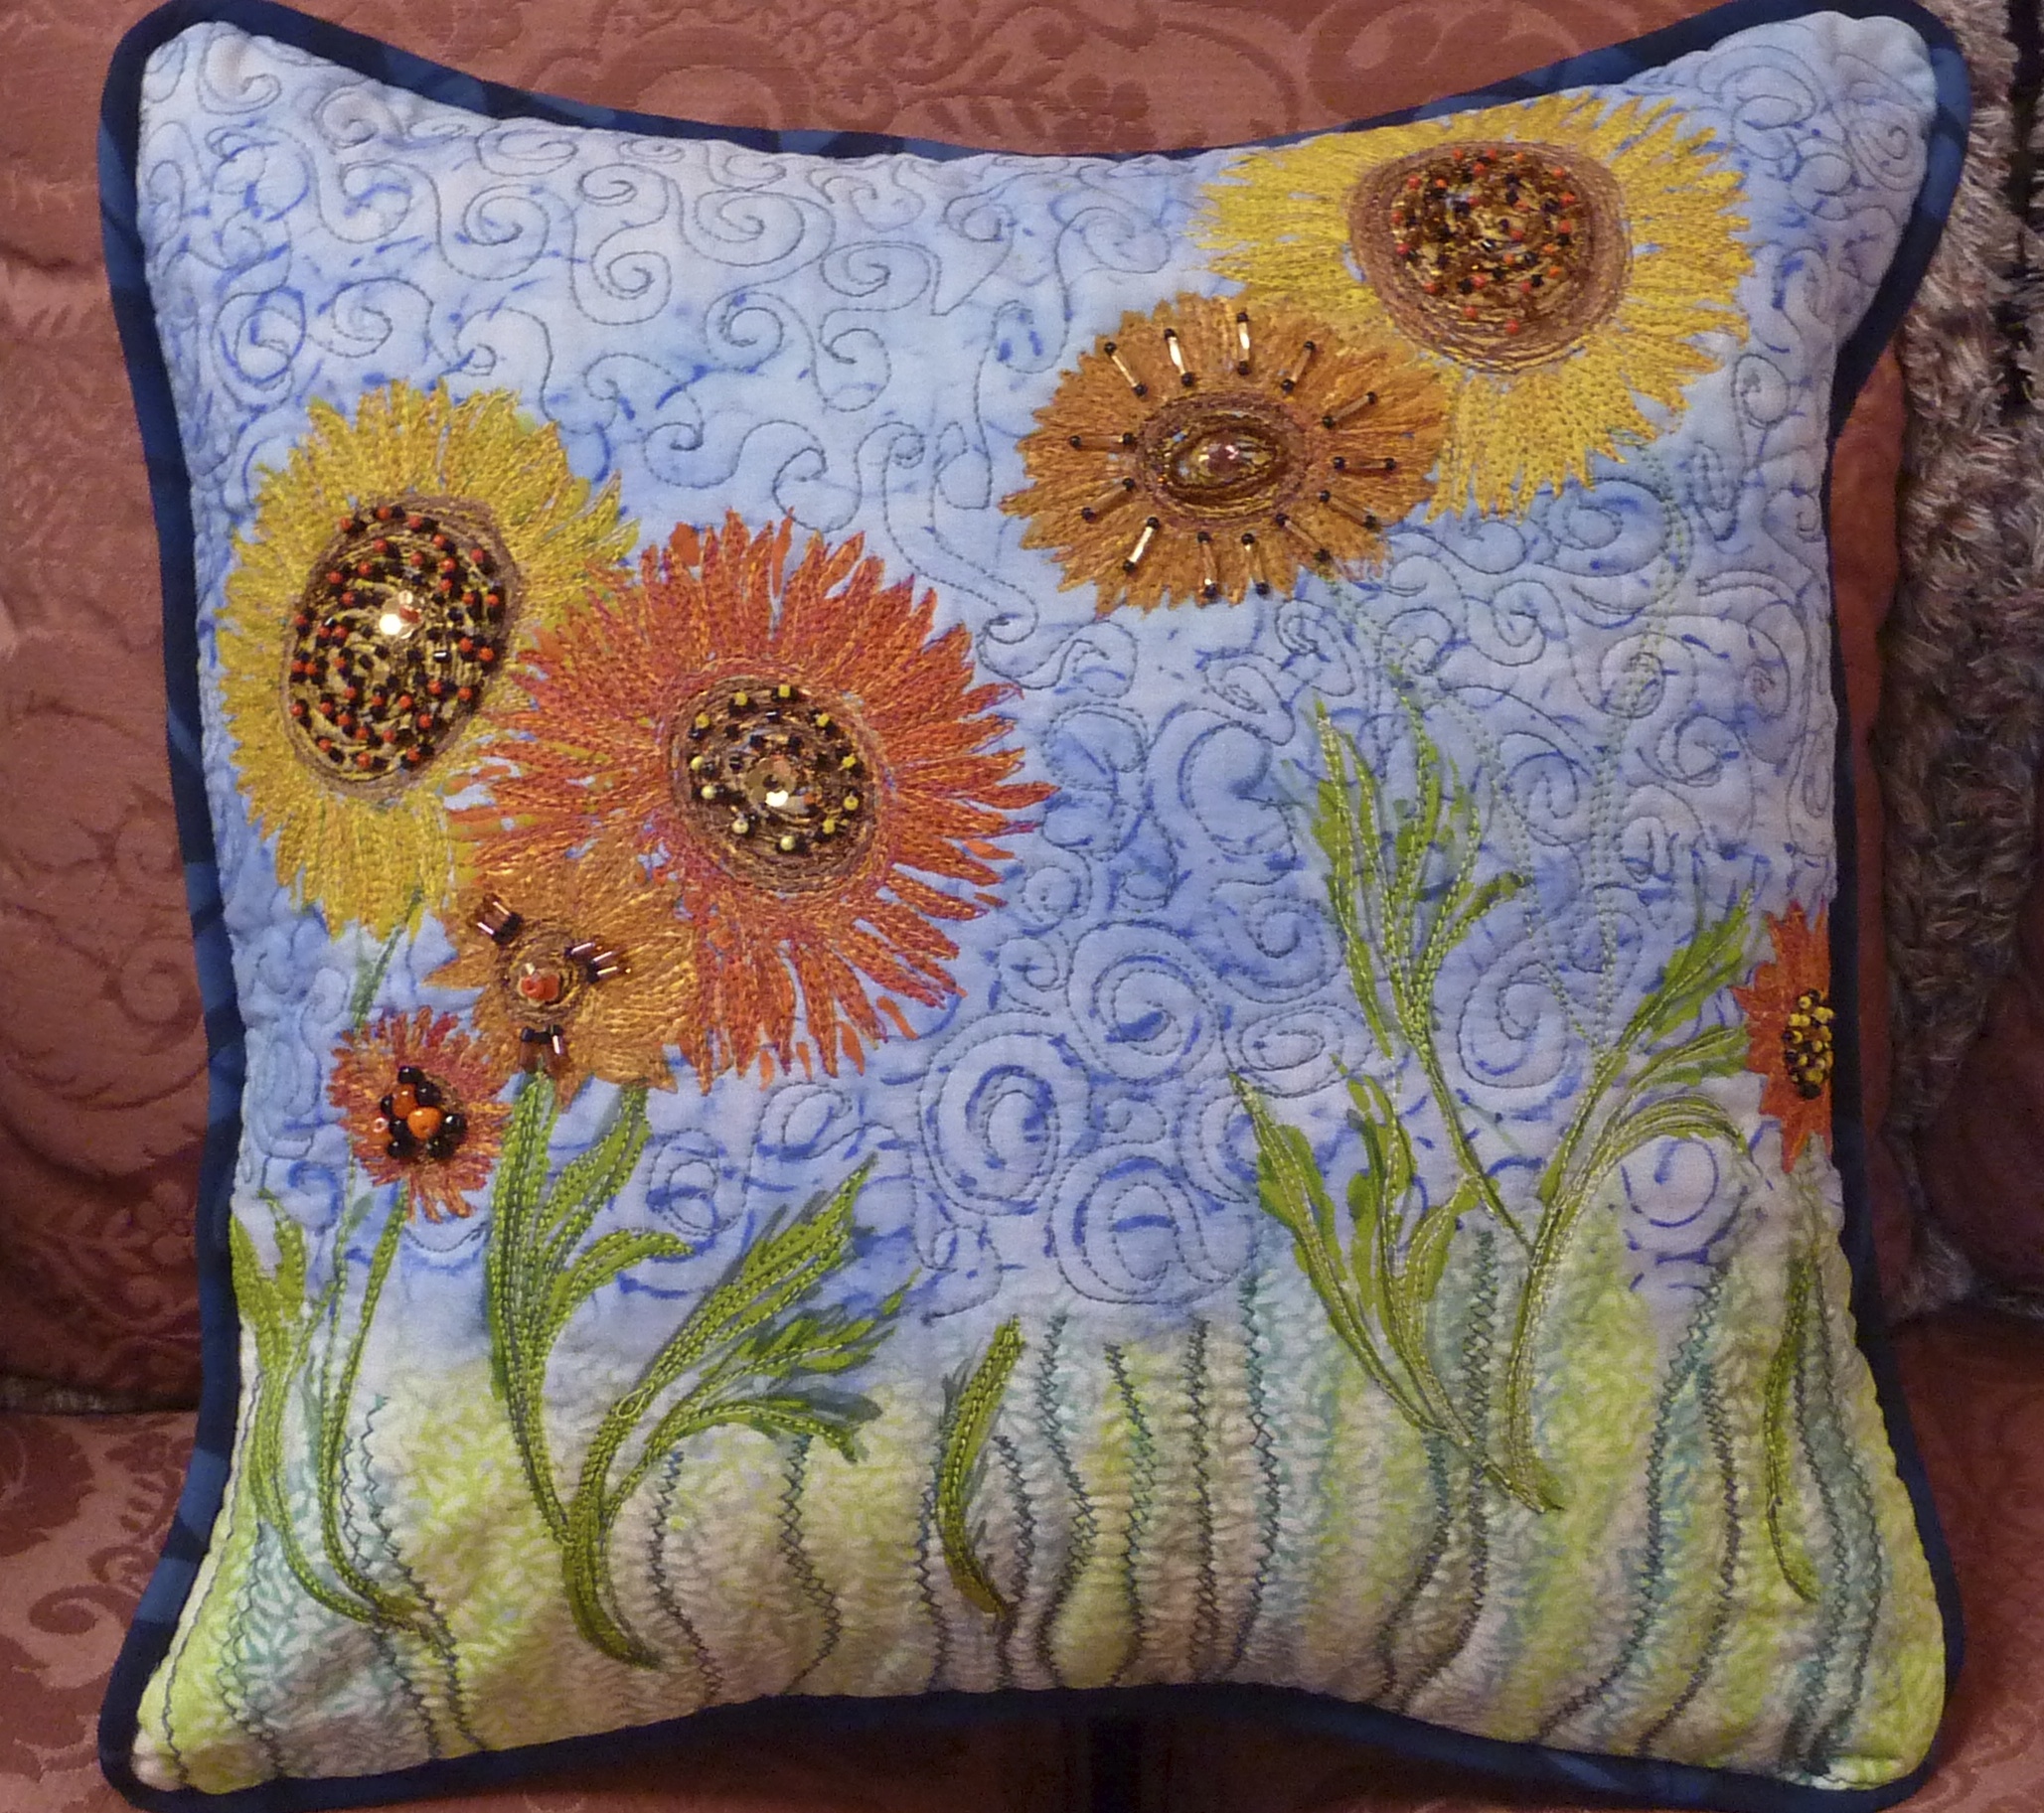
You can create your own design or fashion your pillow along the lines of this one that I made for this class.
I started with a piece of white PFD Kona cotton and painted the background with an acrylic wash of color. Next I painted the flowers and layered the piece with batting and lining. Then the REAL fun began as I used thread painting to add depth and texture to the design. Here’s where you can really let yourself experiment with color and various thread weights. I particularly liked the look of some variegated 30 wt. thread.
When I declared the thread painting “done” I got out my beads and went to town! Because this will be used for “show and tell” in class I wanted to be sure to incorporate several basic beading stitches. I used moss stitch, scatter stitch, seed stitch, bugle pathways, back stitch and stacked stitch.
My goal was to achieve a vibrant mix of color, texture and bling.
Call Baron’s today to sign up – This is a FUN class.
Hey – L.A. area friends – This coming Saturday I will be participating in an Open Studio and Art Bazaar in downtown Los Angeles. Come and see a wonderful display of art and start early on your Holiday gift search!
I’ve been busy preparing for what is shaping up to be an exciting Fall schedule of teaching. One of the new workshops planned is to make your own decorative pillow. You will paint your own fabric and embellish it with beads. The class is on the schedule at Baron’s Sewing Center in Woodland Hills for September 24th and October 8th, 2013.
Here is the one that I finished the other day.
I started with a piece of white PFD Kona cotton and painted the background with an acrylic wash of color. Next I painted the flowers and layered the piece with batting and lining. Then the REAL fun began as I used thread painting to add depth and texture to the design. Here’s where you can really let yourself experiment with color and various thread weights. I particularly liked the look of some variegated 30 wt. thread.
When I declared the thread painting “done” I got out my beads and went to town! Because this will be used for “show and tell” in class I wanted to be sure to incorporate several basic beading stitches. I used moss stitch, scatter stitch, seed stitch, bugle pathways, back stitch and stacked stitch.
My goal was to achieve a vibrant mix of color, texture and bling. Did I achieve it??
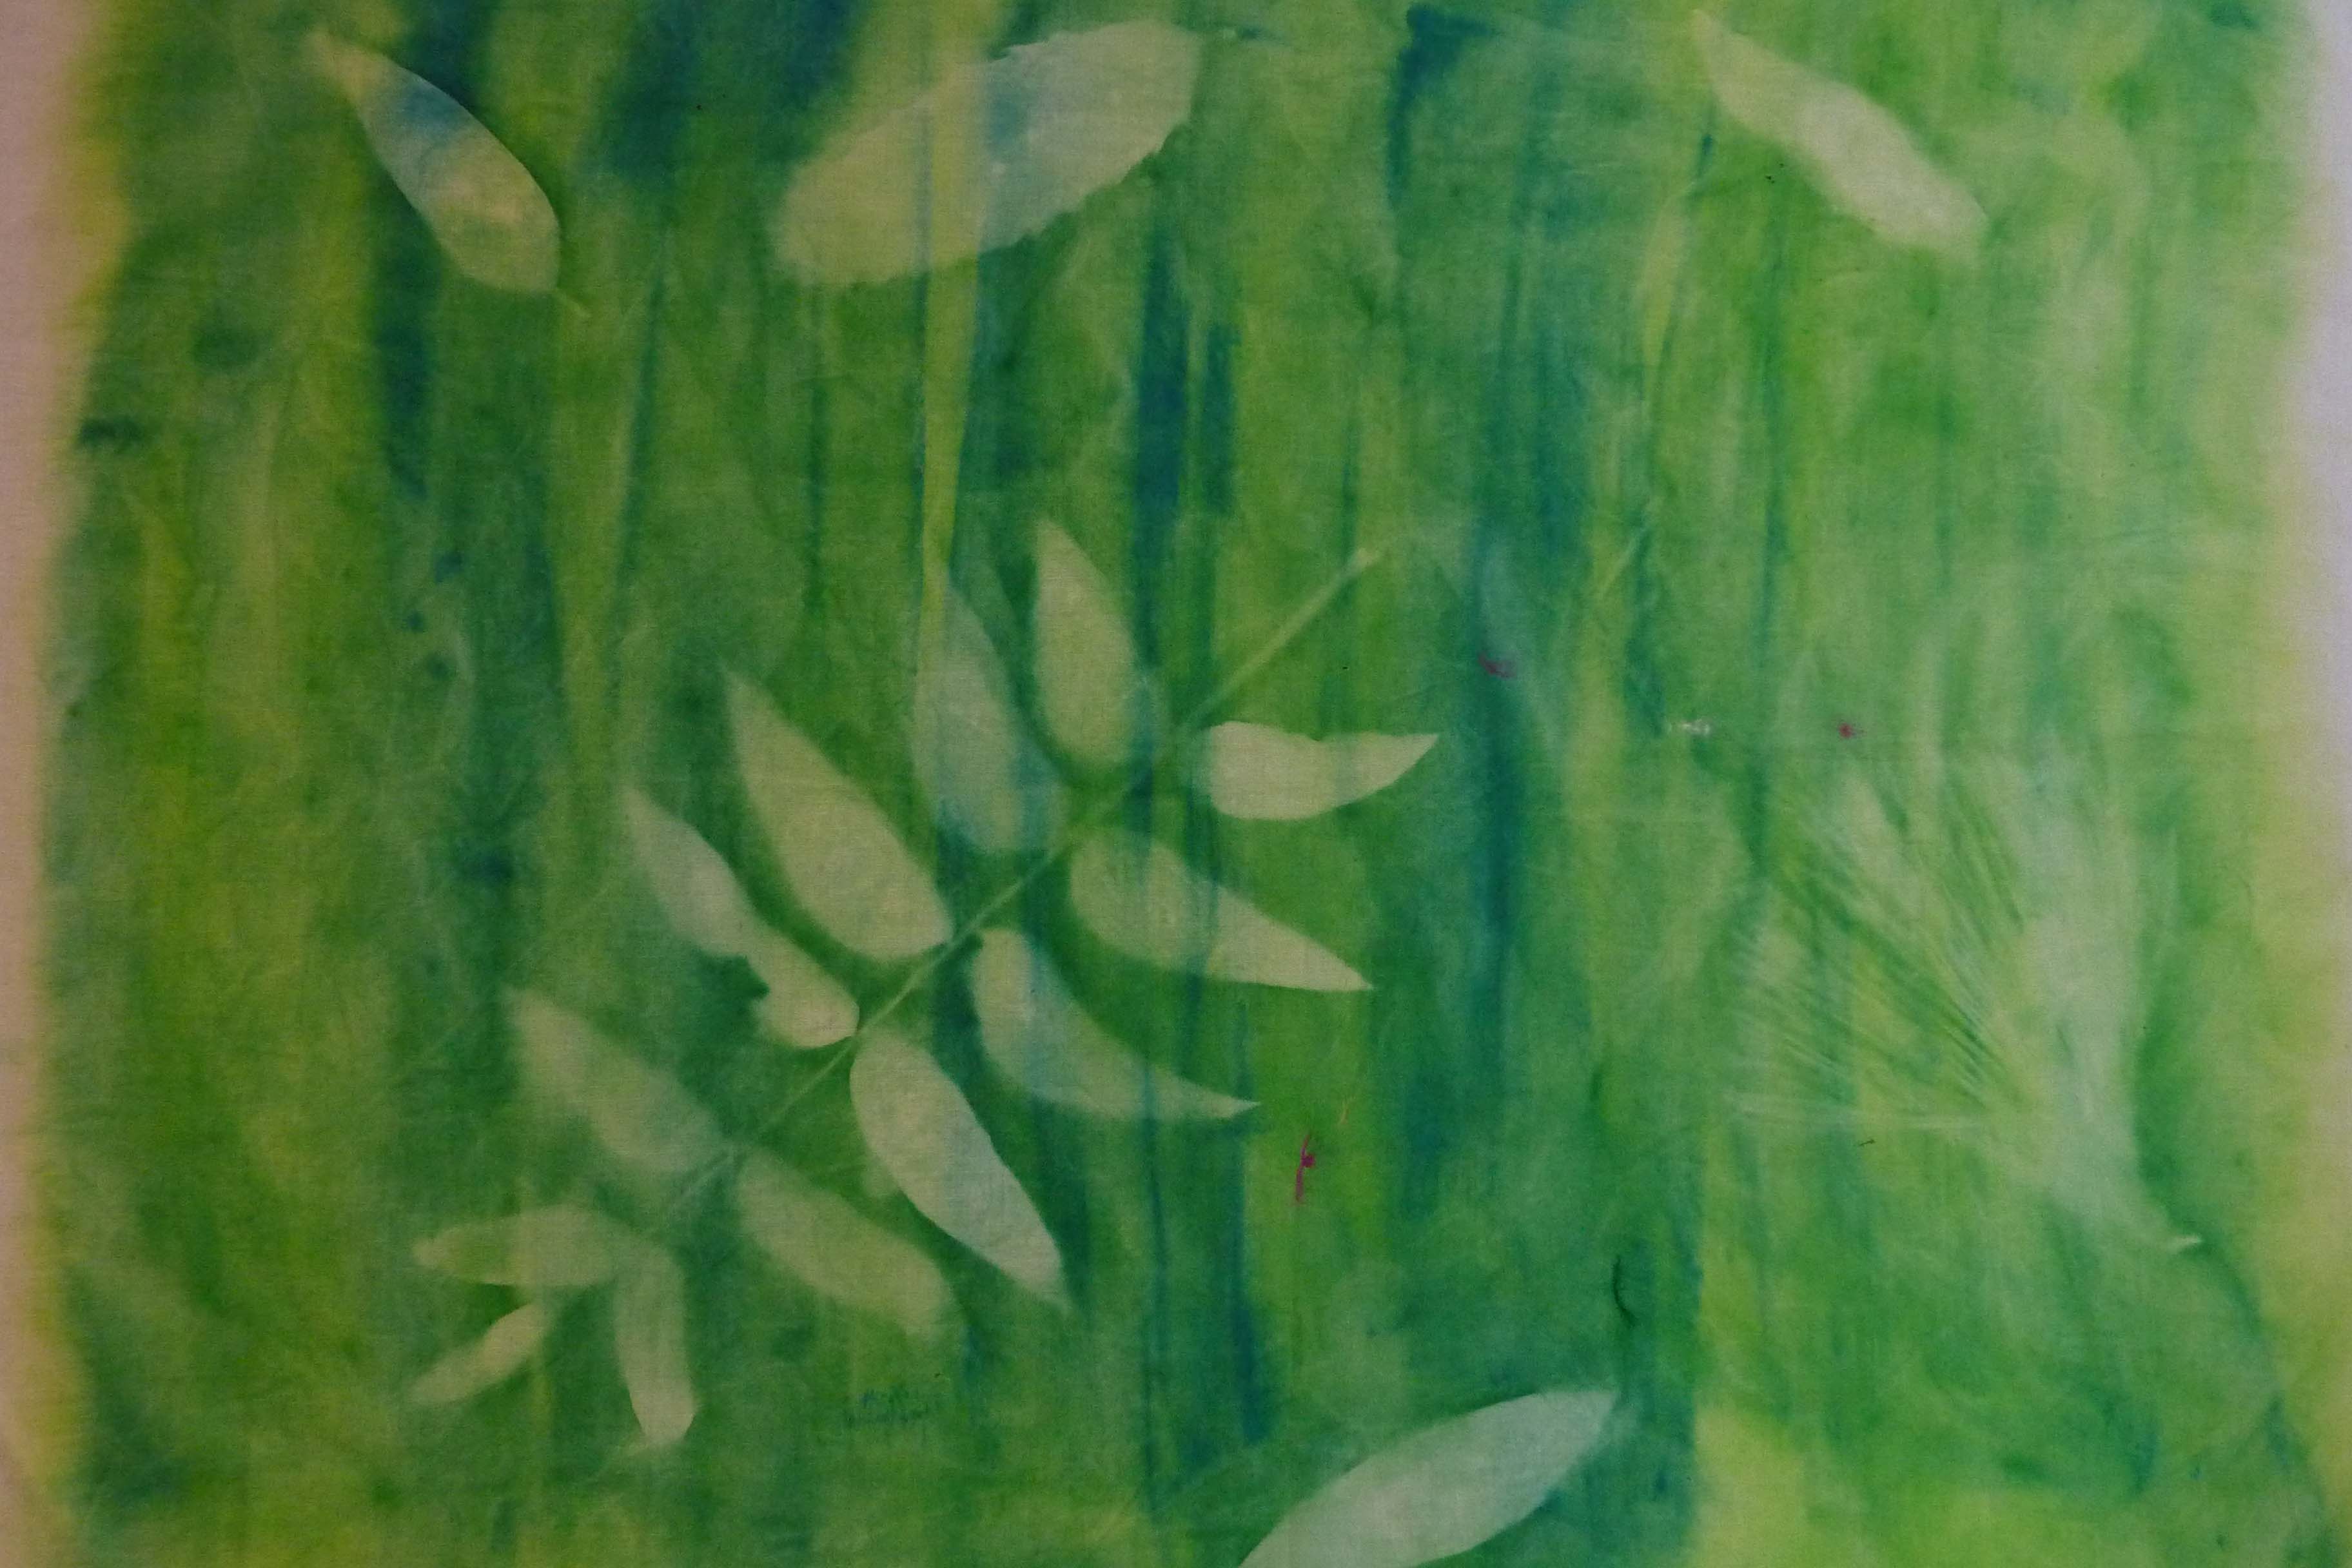
I love Sun Printing – the serendipity aspects are marvelous, especially using organic masks – you’re never quite sure how it’s going to turn out. And, if you don’t like the results just repaint your fabric and start over.
Materials you will need:
Fabric – 100% white cotton – prewashed in detergent and dried
Clothes you don’t mind getting paint on
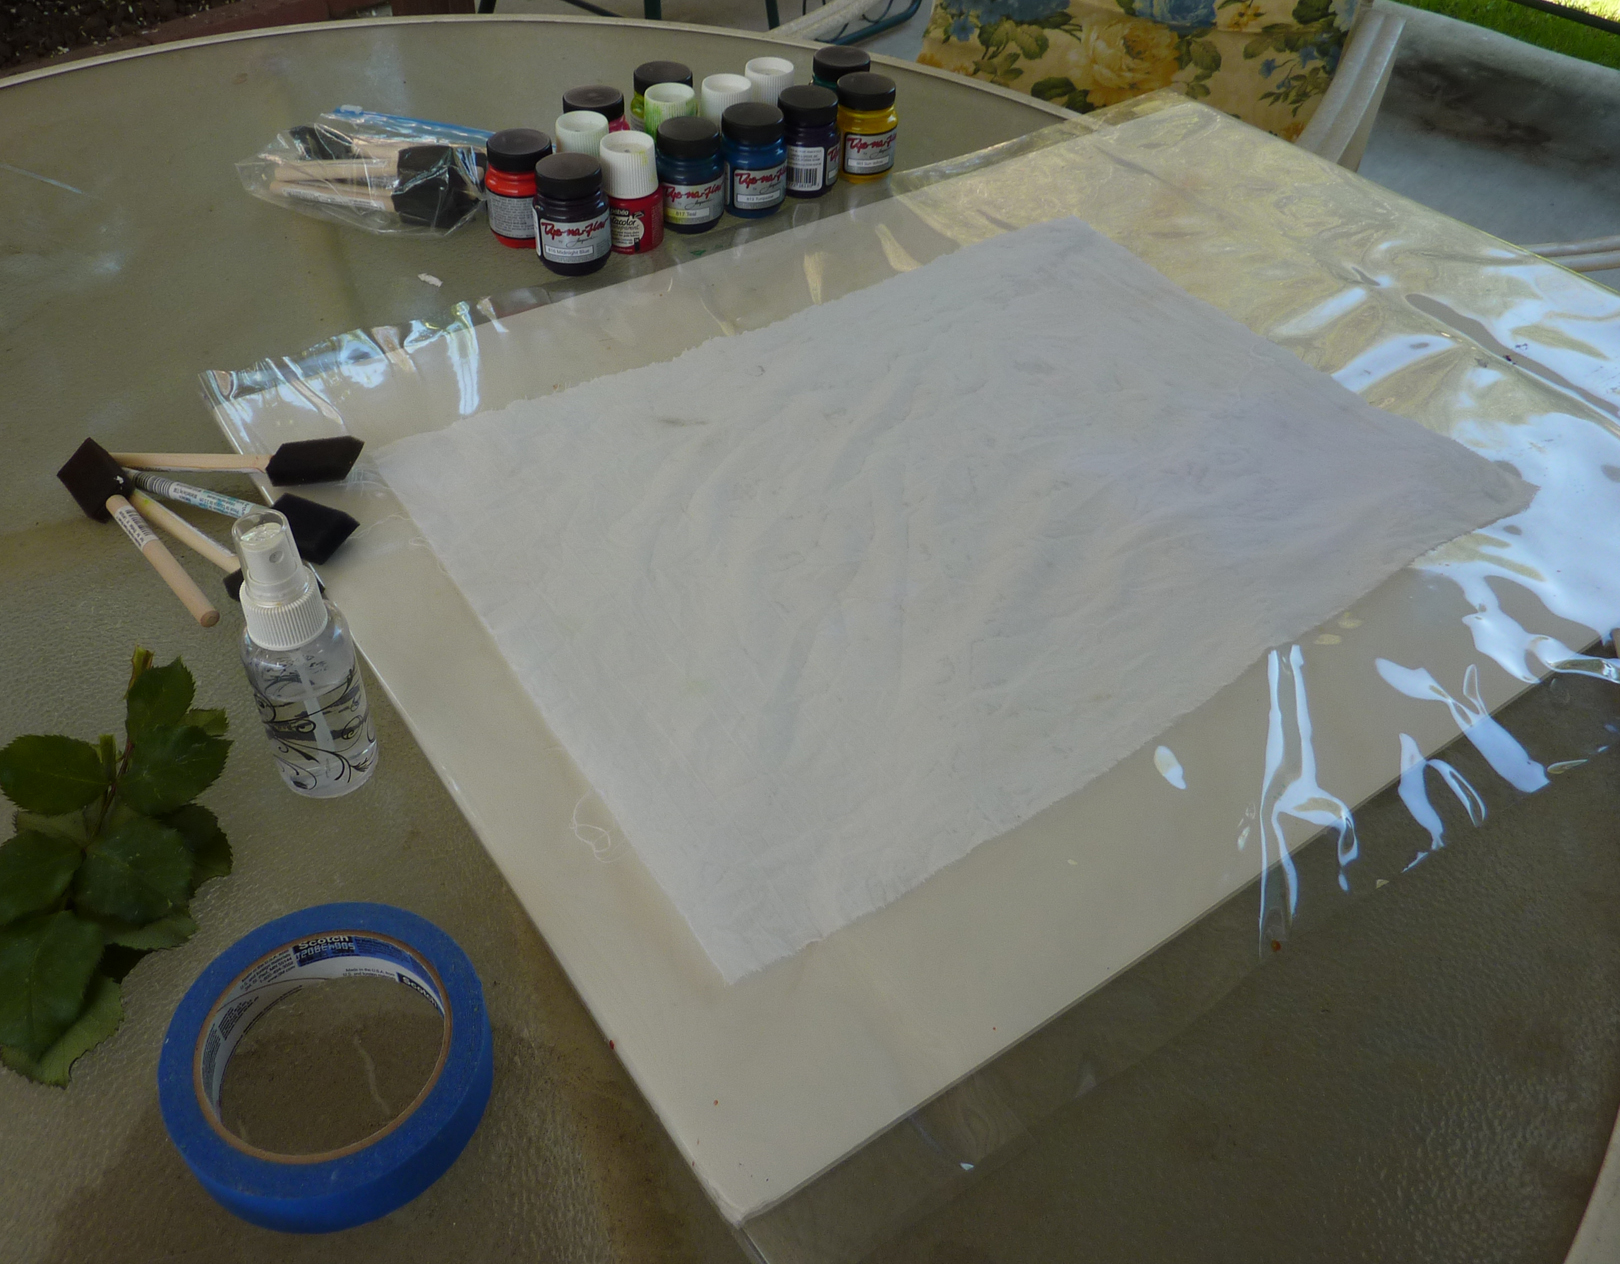
a portable work surface: cover a piece of heavy cardboard with plastic and tape the plastic securely to the reverse side of the cardboard. The work surface should be a couple of inches larger than your fabric piece all around.
Straight pins
Paint: sun sensitive fabric paint such as Dye-Na-Flow (from Lumiere) or light sensitive Setacolor fabric paint Use from 1 to 3 different colors.
Foam brushes ½ inch to 1 ½ inch
Plastic bowls (one for each color that you will use –
Spritzer bottle with water
Prepared work surface and wet fabric
A variety of items to use as masks to create your design:
Use items that have enough weight to sit firmly on the fabric so that the sunlight doesn’t leak in under the edges in order to create a nice crisp print. Lighter items will give you a more subtle look. If there’s a light breeze you may want to place a weight such as a hardware washer on top of a mask that could blow away or shift position. (such as a leaf) A fine straight pin could be used to hold your item to the fabric as well. Just make sure that it doesn’t cast a shadow -unless you want that effect.
The paint used in Sun Printing works by seeking out a light source. So when you place a mask over a section of painted cloth, the paint will migrate into uncovered areas of fabric.
Here are some examples of masks you can readily find:
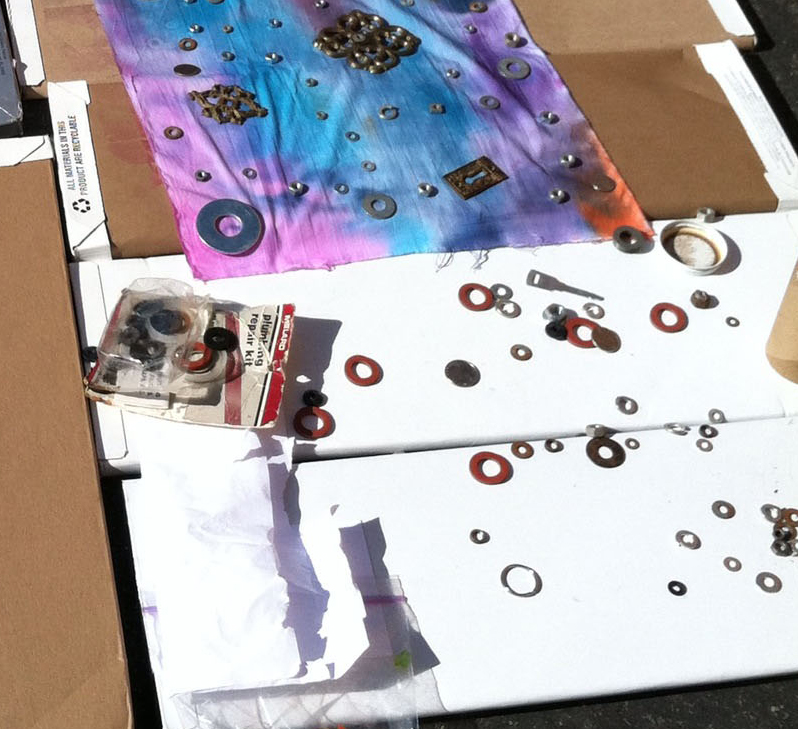
Found items such as old keys, coins of various sizes, buttons, safety pins, string of beads, botte caps
hardware items such as washers, screws, nuts and bolts
items you can pick up on a walk like leaves, petals, stones, fronds, stems
stencils (your pattern will be reversed)
shapes you cut out yourself from cardboard.
A variety of objects can be used to mask areas of your painted surface and produce your print
Method
Secure your fabric to work board with pins or use masking tape to secure the edges.
Wet down fabric thoroughly with water/spritzer bottle. Keep the fabric wet until you’ve finished arranging your design.
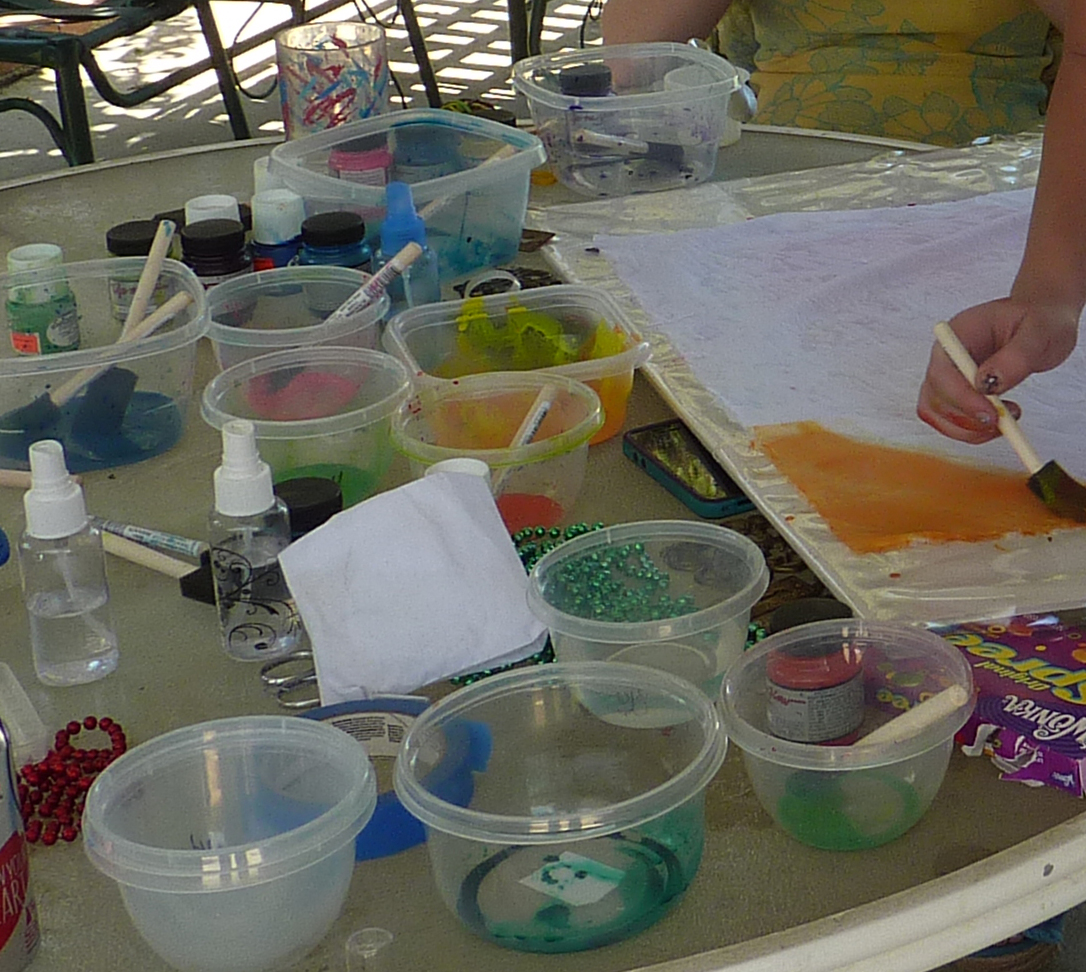
Choose between 1 and 3 paint colors for your first project. Mix a small amount of each color with 2 parts water, placing one color solution in each bowl.
Wet foam brush and start painting fabric. Remember this is a background. It doesn’t have to resemble anything; it is simply a colorful backdrop for your printing items. While painting with color #1, leave white spaces for additional colors.
As you add your additional colors, spritz more water to help the colors spread and mix at the edges.
Have your masking items ready to arrange on your fabric immediately, especially if you are outside on a warm sunny day!
7. Quickly arrange masking items on to wet painted surface of fabric.
8. Take fabric – along with work surface to a sunny spot and allow to dry for 30 minutes to an hour – depending on temperature and humidity.
9. Remove masks when completely dry.
10. Press fabric with a hot dry iron for about 4 minutes to set the paint.
The resultsMore Rose Leafs – different color scheme
We just dropped off 2 embellished journal covers at Baron’s. “How to create an embellished/collaged fabric journal cover” Workshop is scheduled for Saturday March 16 and repeated Tuesday March 19. Call Baron’s to register or for details.
This cover fits a composition book approximately 9 inches high by 7 1/2 inches wide.
Collaged Fabric Journal Cover
This is the size we will be making in class. We will provide the composition books in the purchased supply kit.
This cover was adapted to fit a spiral bound art journal measuring approximately 5 1/2 inches by 8 inches. We will provide guidelines for adapting directions for other sizes.
About a year ago I signed up for a watercolor class at the local Y – not being an avid watercolor fan especially, but being very eager to take a ‘formal’ class in one of the Fine Arts; to learn art technique and principles from that perspective.
Well, I was not only presented with all kinds of wonderful information, I became fascinated with using this form of paint. I love the transparency of watercolor and the ability to subtly layer color upon color. It is so exciting to put down a swipe of color on a wet surface and to coax it gently in the direction you want. The color has a mind of its own and often does more interesting and exciting things than your original idea.
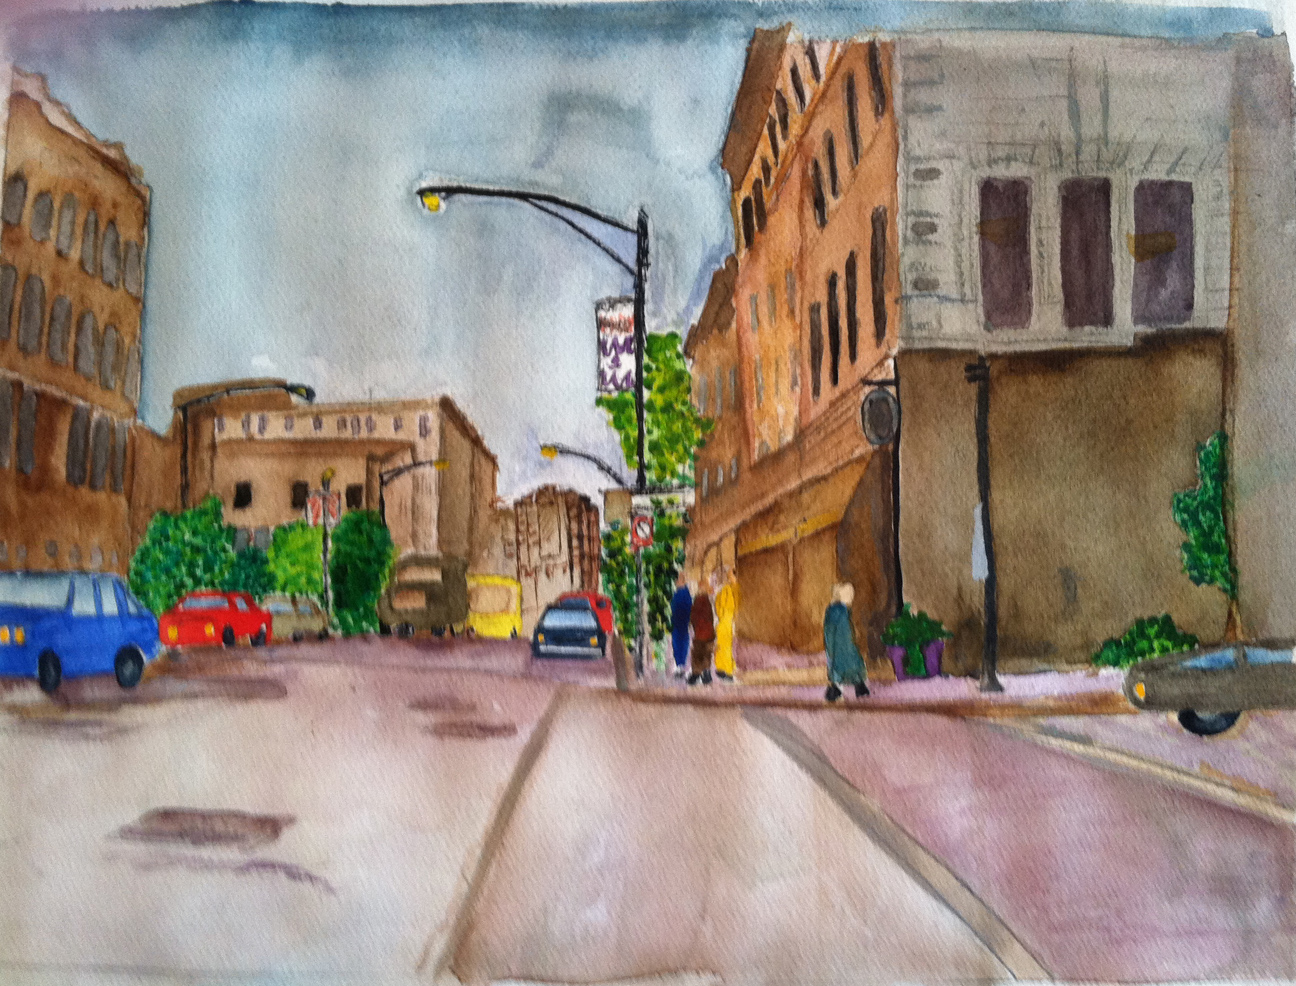
I’ve worked on various kinds of projects to learn different skills – most of these are still unfinished. Some will remain unfinished – some I am still working on. This street scene is probably my favorite completed piece thus far.
Street Scene, Downtown Chicago Watercolor by Guila Greer, Feb 2013
Just got this in the mail from WordPress.. Some pretty nice numbers there – thanks to all of you. I’m appreciative of each and every one of you who takes the time to see what’s going on here and especially when you leave a like or comment.
I want to write what YOU want to read about. PLEASE tell me what that is. Here are some prompts to get the juices flowing:
What kind of art quilt techniques are you interested in? What kind of sewing/quilting tools would you like to have reviewed? Are you interested in seeing my experiments with fabric and surface design? caution: some of them turn out UGLY, lol. Let me know what you want to see more of and I’ll do my very best to comply.
Have a wonderful, safe, healthy and happy 2013! Thanks for all your support in 2012.
Guila
The WordPress.com stats helper monkeys prepared a 2012 annual report for this blog.
Here’s an excerpt:
600 people reached the top of Mt. Everest in 2012. This blog got about 4,300 views in 2012. If every person who reached the top of Mt. Everest viewed this blog, it would have taken 7 years to get that many views.
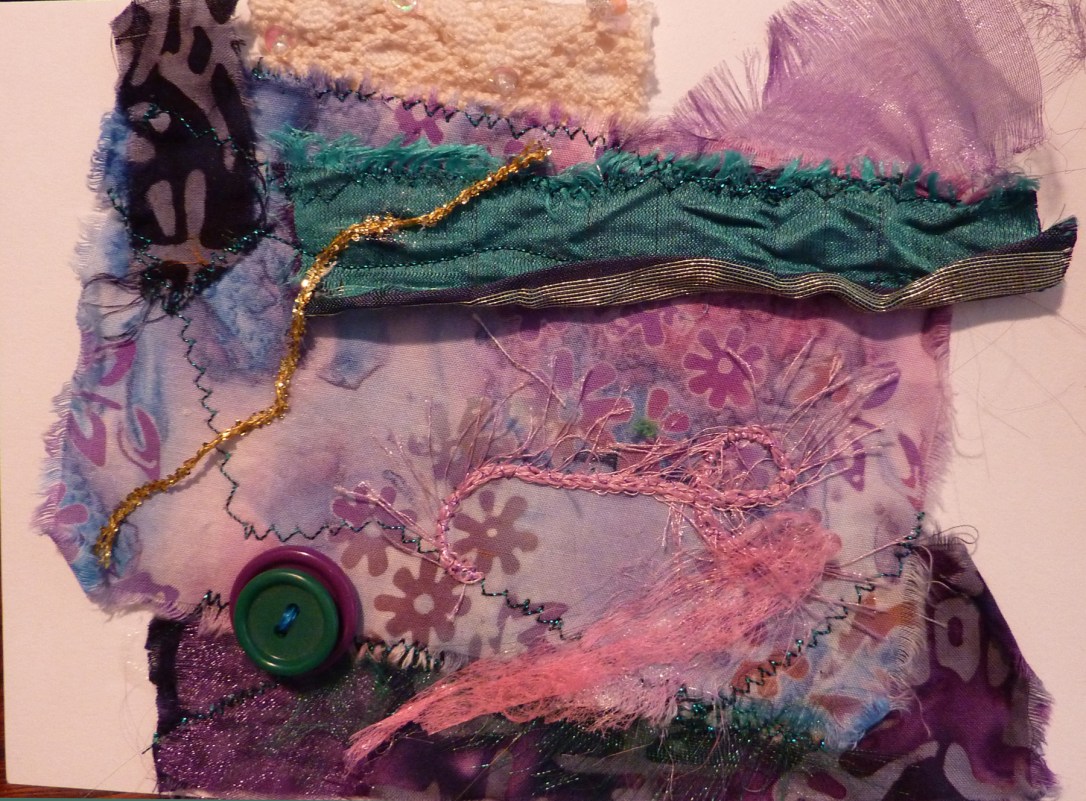
As the year is winding down I’m busy getting my act ready to take on the road for 2013. A new workshop being offered is Celebration Art Cards.
This is one of my favorite things – creating small mixed media pieces – combining colors and textures as I go to achieve a special look. It’s all about color – movement – mood – and most of all letting those creative forces loose and having FUN!!
Here is a preview:
Workshop being offered at Baron’s Sewing Center Friday January 18: 4 PM until 7 PM.
In addition – I will be demo-ing this technique at the San Fernando Valley Quilt Association’s annual Quilt College, Monday February 18, 2013
I can say two things for sure: Teaching teenagers art quilting fundamentals is FUN !!! and… Teaching teenagers art quilting techniques is EXHAUSTING !!!
I just finished up 3 days of workshops at Baron’s Sewing Center in Woodland Hills with a group of bright and talented young women. They were eager to learn and to put their new skills into action.
Day One:
We started off with a lesson in Sun printing using Dynaflow Paint from Jacquard. The plan was that the pieces would dry in the sun while we went on to the next topic. Well, Betsy and I knew they’d enjoy the process but hadn’t realized that this technique would be the hit of the day! All they wanted to do was to Sun Print!!! And I must say some amazing work was produced by these budding artists. (I will be putting a Sun Printing Tutorial on my Blog shortly for all to enjoy).
Prepared Panels Drying In the Sun
The girls used all kinds of things to create their patterns – plumbing washers, nuts, bolts, coins of all sized, keys, decorative flashings from keyholes – sequin waste and decorative cutouts of their own design.
The session on painting techniques continued with stencilling paint on fabric and using rubber stamps to apply acrylic paint as well as pigment or dye ink from stamp pads.
Day Two started with a unanimous request for MORE SUN PRINTING !!
We were glad to oblige but made sure we got to the new stuff as well. Our students learned the use of Fusible web to apply designs to their quilt tops and how to assemble the layers that would give them a foundation for quilting their pieces.
It was exciting and gratifying to see how quickly these girls caught on to the concept of free motion quilting. And although mastery of this technique takes many hours we saw some commendable first timer results here.
Day Three commenced with yet more requests for painting. I promised they could do that after we talked about a couple of other things. I reminded them how excited they had been with the idea of applying glitter to their quilts and took a few minutes to demonstrate how easy it is to do that.
We also went over the many uses of angelina fibers (one teen asked, “What about Brad?” and my response was “huh?”)
They had all decided that they wanted to turn their quilted panels into pillows. So I proceeded to show them how to assemble a removable pillow cover using the pieces they had just created. Here they are digging into the scrap bag looking for suitable pillow back fabric.
looking for that perfect piece to back their pillow with
Here is some of the work produced by this talented bunch.
Original drawing from one of our talented teensAnd More Creativity on Display