Art, Art Quilt, bracelets, Fiber Art, Prayer Flags (mini tute), Tutorials

Prayer Flags Flying High (and mini tutorial)

I thought for sure that I had posted about making prayer flags but not so!  Prayer flags have a long tradition and they can be seen in many different configurations.   There is no right or wrong way.  There is a blog devoted to Prayer Flags at :  ThePrayerFlagProject.blogspot.com      There you will find tutorials and many examples of how various artists have interpreted and created their own Prayer Flags.  (mine are posted in March this year 2015)

I had thought about making and hanging some flags for well over a year and was waiting to be inspired it seems 🙂   A few months ago I was walking down the aisle of a local craft shop and found a package of burlap banner shaped pieces in the clearance section.  The first thing that I thought of was that they would be perfect for Prayer Flags.  And if I messed up, then the investment was minimal.

There were four of these burlap shapes in front of me looking like this:

burlap for flagseach measured 5 1/2 ” by 7 1/2 “

The first thing that I did before anything else was to stay stitch inside all the edges of all the flags to minimize fraying.  Burlap frays. I didn’t mind that,  It enhanced the rustic look that I was trying to achieve.  But I did want to contain the amount.    I used black thread and a zig zag stitch and stitched each flag on every side about 1/4 inch in from the edge.IMG_3498

        I figured there was no hiding of the stay stitching so I incorporated it into the overall design

You are goiing to need to attach a narrow muslin muslin hanging sleeve attachedsleeve to the top.  Do that now by machine UNLESS you are going to use that top space for your hand stitching later.  In which case you will attach the sleeve as the last step with each flag.

inspire_dream

Gather your fabrics and threads and design your flags.  I used muslin for the inspirational words, and a variety of fabrics: cheesecloth, bits of organza, felt, burlap.  Use whatever your design calls for!

hope_loveI also added a few beads, some ribbon and buttons and hand stitched with embroidery cotton of various sizes.      

The final step was to string the four finished flags together by running a length of hemp through the sleeves.

Details of the Four Flags Belowdetail_hope

detail_loe

detail_inspire

detail_dream

Accessories and Ornaments, Art, Fiber Art, Mixed Media, Tutorials

Tutorial – Fiber Art Collage – Greeting Cards

Fiber Art Collage

Here’s how I approach the process. It’s art, after all, so feel free to bend, change or ignore any of the following steps.    

Supplies: (read through the tute – it’ll make more sense)

  • Blank Greeting Card (or medium of choice for mounting)
  • Background Fabric – a scrap from your stash
  • Batting or stabilizer to match size of background
  • Various scraps of coordinating fabric, threads, fancy fibers, Angelina, cheesecloth, ribbons, other non-cotton scraps such as wool, silk, burlap etc.
  • Glue stick – acid free
  • Thread to sew together layers of the collage. Machine or embroidery thread
  • Other embellishments of your choice: beads, charms etc.

Method:

  1. Determine the overall “feel” of the piece – Elegant? Playful? Modern? Romantic?
  1. Gather from your scrap bag and from your stash – pieces and bits that you think might belong in this piece (I often use color as my theme)


Gather scraps and other possible materials to use
  1. Vary these design elements such as you would for any composition
  1. I think of these pieces as mini art quilts and assemble in layers
  • Layer one – background (stabilized)
  • Layer two – texture and color
  • Layer three – focal motif   (just one example of my approach)

5.   If preparing your mini fiber art collage for a greeting card – roughly cut your background fabric to measure at least one inch in from all four sides.


photo 3 (2)

e.g. card is 5 by 7; background fabric no larger than 3 by 5

Your collage will be built on this background; may entirely cover it; may extend from any or all of the sides.   If you prefer a frayed edge, tear your fabric instead of cutting.

6.  Stabilize your background by whichever means you prefer (and happen to have on hand). I like to use something like Pellon Craft-fuse or Décor Bond. Or I may use regular cotton quilt batting.  If you use batting, cover it with muslin so that it will adhere firmly to the card.

Stabilizer of your choice added to wrong side of background fabric

7.  Add your texture and color elements into a design that pleases your eye. Pin first, then stitch to attach elements to background.   Or just go for it; don’t overthink t!

First layer enhanced by ribbon and hand dyed cheesecloth.
First layer enhanced by ribbon and hand dyed cheesecloth
another possibility explored

8.  Quilt by machine or by hand with thread of choice. Get crazy!

First pass at the machine with a narrow zig-zag stitch.  You can see that I was tweaking as I went.
First pass at the machine with a narrow zig-zag stitch. You can see that I was tweaking as I went.

The angelina scrap was pinned to the piece after the stitching.

 9.  Add your final element(s). This may be a focal point OR it may be something (for example a circle of couching or beads) that enhances the focal element.  In this case I isolated one element from some vintage lace trim and painted it.

photo (1)

10.  Affix your completed piece to the front of the card with an acid free glue stick. (I like UHU best but also use Avery or others)

 Have fun!  I’d LOVE to see what you come up with.  Send a pic to me – and I’ll post it!

And please let me know what you think of this tutorial…  Thank you!

© Guila Greer 2014

This tutorial and all photos are the exclusive property of Guila Greer. It is for your personal use only. Please do not copy.
Thank you very much for your understanding.
Accessories and Ornaments, Fiber Art, Home Dec, Quilts

Class Alert – Gorgeous Autumn Wallhanging (or Table Topper)

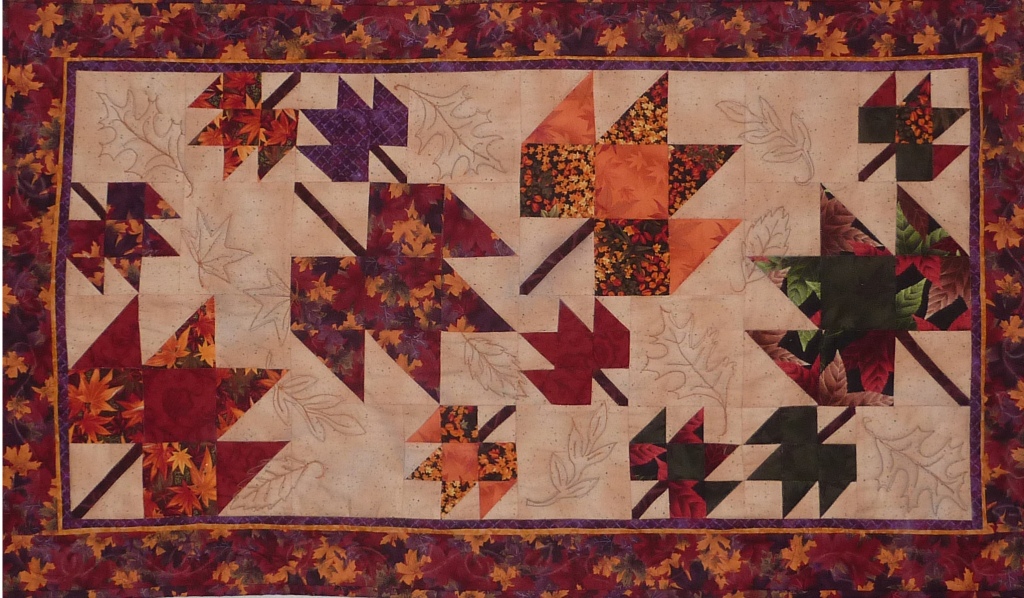
Tumbling Leaves Wall Hanging or Table Topper

Grace your Thanksgiving table with this beautiful Tumbling Leaves quilt – shown in a versatile size ready to decorate your wall or your table throughout the season.

2 sessions on 2 consecutive Saturdays from 10 AM until 2 PM

 Part 1 October 18  10-2

Part 2  October 25  10-2

Call Quilty Pleasures in Simi Valley today to reserve your spot  805-581-1577

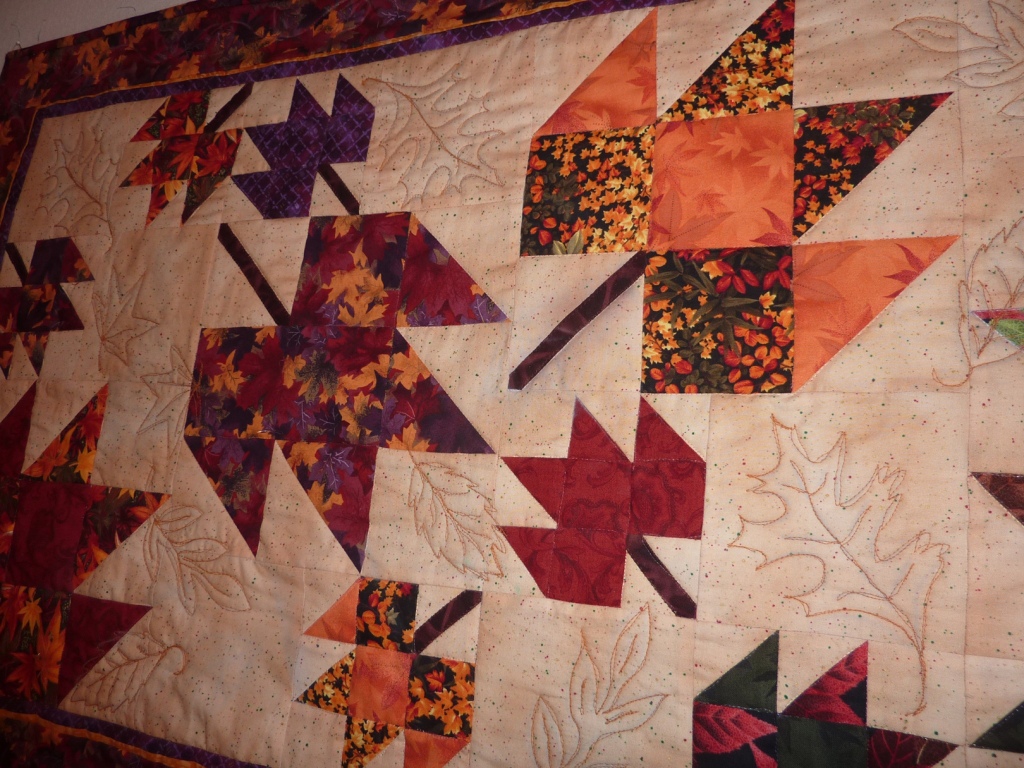
leaves_quilting
Closeup of Quilting
Accessories and Ornaments, Home Dec

Paint and Bead Your Own Decorative Pillow – Back by Popular Demand

Paint and Bead Your Own Decorative Pillow

originally Posted on November 1, 2013


Back By Popular Demand

Make your own decorative pillow.  You will paint your own fabric and embellish it with stitching and beads.  The class is on the schedule at Baron’s Sewing Center in Woodland Hills for Tuesdays January 14 and January 21st 2014 
 6 pm until 9 pm 
(6 Hours total – 3 hours each day)

You can create your own design or fashion your pillow along the lines of this one that I made for this class.

P1040166

I started with a piece of white PFD Kona cotton and painted the background with an acrylic wash of color.  Next I painted the flowers and layered the piece with batting and lining.  Then the REAL fun began as I used thread painting to add depth and texture to the design.  Here’s where you can really let yourself experiment with color and various thread weights.  I particularly liked the look of some variegated 30 wt. thread. 

When I declared the thread painting “done” I got out my beads and went to town!  Because this will be used for “show and tell” in class I wanted to be sure to incorporate several basic beading stitches.  I used moss stitch, scatter stitch, seed stitch, bugle pathways, back stitch and stacked stitch.  

My goal was to achieve a vibrant mix of color, texture and bling.

Call Baron’s today to sign up – This is a FUN class.

818-224-2746

Fiber Art, Home Dec, Workshops

New Workshop Added – Holiday Table Topper (or Treeskirt)

Holiday Table Topper

Isn’t this lovely?

Come and join the gang at Quilty Pleasures Wednedays November 6 and 13 and make this delightful holiday Table Topper.

Or you can fashion your creation to be a Christmas tree skirt – your choice.

The class will be held from 5:30 until 8:30 on 2 consecutive Wednesday evenings.  Call Quilty Pleasures today to reserve your spot.

805-581-1577  for Quilty Pleasures in Simi Valley

Accessories and Ornaments, Art Quilts, Fiber Art, Home Dec, Workshops

Paint and Bead Your Own Decorative Pillow

Back By Popular Demand

Make your own decorative pillow.  You will paint your own fabric and embellish it with stitching and beads.  The class is on the schedule at Baron’s Sewing Center in Woodland Hills for Tuesdays November 12th and November 19th  
 6 pm until 9 pm 
(6 Hours total – 3 hours each day)

You can create your own design or fashion your pillow along the lines of this one that I made for this class.

P1040166

I started with a piece of white PFD Kona cotton and painted the background with an acrylic wash of color.  Next I painted the flowers and layered the piece with batting and lining.  Then the REAL fun began as I used thread painting to add depth and texture to the design.  Here’s where you can really let yourself experiment with color and various thread weights.  I particularly liked the look of some variegated 30 wt. thread. 

When I declared the thread painting “done” I got out my beads and went to town!  Because this will be used for “show and tell” in class I wanted to be sure to incorporate several basic beading stitches.  I used moss stitch, scatter stitch, seed stitch, bugle pathways, back stitch and stacked stitch.  

My goal was to achieve a vibrant mix of color, texture and bling.

Call Baron’s today to sign up – This is a FUN class.

818-224-2746

Fiber Art, Home Dec, Home Dec, Workshops

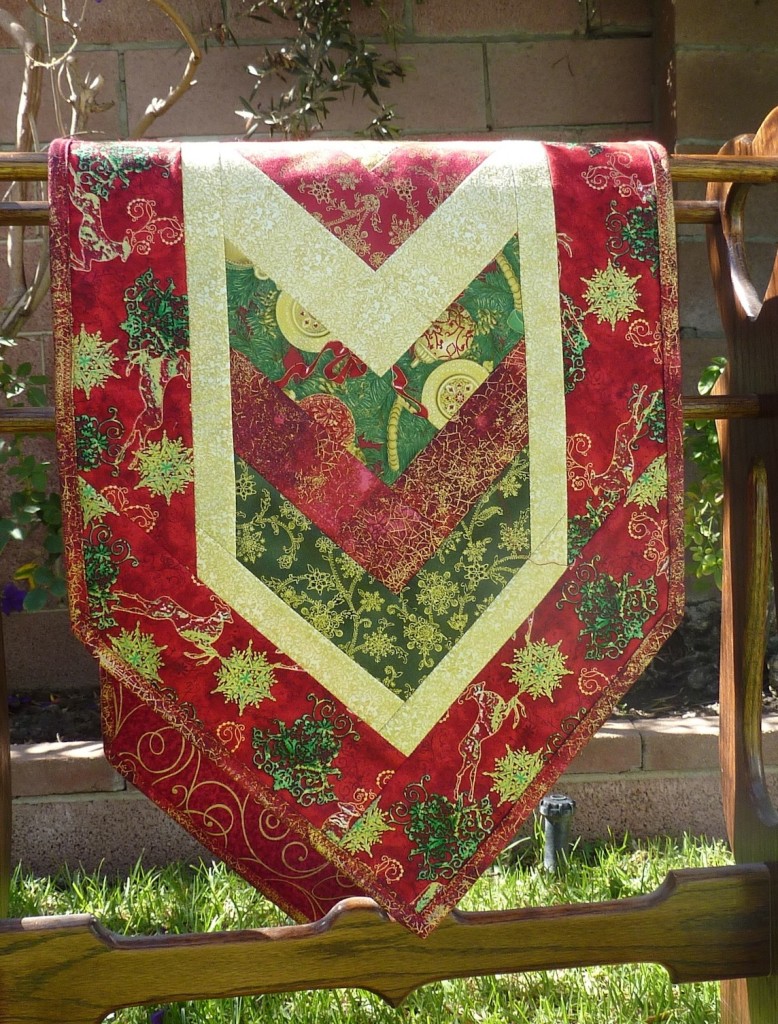
Learn to “Quilt As You Go” with this Gorgeous Christmas Runner

P1040312

Sign up for this class at Quilty Pleasures – Simi Valley –  It is sceduled for Saturday November 2 from 10 AM until 4 PM.

You will make a beautiful piece of Home Decor to use as a table or mantel runner.  It is shown here in festive holiday colors but can be made in the fabric of your choice.

“Quilt As You Go”  so that when you have finished adding the last border you are finished!  Quilting has already been done.

This is going to be a fun class so go ahead and call the shop today to reserve your spot.

805-581-1577     1742 E. Los Angeles Ave., Simi Valley

Accessories and Ornaments, Fiber Art, Tote Bags, Workshops

You NEED This !!

P1040216

Whether you call it your “Goin Quiltin” bag, your beach bag, your diaper bag or your all purpose “shlep” bag – this tote will hold whatever you like, whenever you like; sturdy, roomy and with pockets galore inside and out.

And we’re having a class on how to make it at Baron’s Sewing Center this Fall.

Tuesday October 15    6 PM to 9 PM    Part 1

Tuesday October 22 6 PM to 9 PM   Part 2        6 hours total.

Call Baron’s today to sign up:  818-224-2746

Accessories and Ornaments, Art, Home Dec

Paint and Bead Your Own Decorative Pillow ! Back By Demand Jan. 14, 2014

I’ve been busy preparing for what is shaping up to be an exciting Fall schedule of teaching.  One of the new workshops planned is to make your own decorative pillow.  You will paint your own fabric and embellish it with beads.  The class is on the schedule at Baron’s Sewing Center in Woodland Hills for September 24th and October 8th, 2013.

Here is the one that I finished the other day.

P1040166

I started with a piece of white PFD Kona cotton and painted the background with an acrylic wash of color.  Next I painted the flowers and layered the piece with batting and lining.  Then the REAL fun began as I used thread painting to add depth and texture to the design.  Here’s where you can really let yourself experiment with color and various thread weights.  I particularly liked the look of some variegated 30 wt. thread. 

When I declared the thread painting “done” I got out my beads and went to town!  Because this will be used for “show and tell” in class I wanted to be sure to incorporate several basic beading stitches.  I used moss stitch, scatter stitch, seed stitch, bugle pathways, back stitch and stacked stitch.  

My goal was to achieve a vibrant mix of color, texture and bling.  Did I achieve it??

Accessories and Ornaments, Art, Art Journal, Dreams, Journal Cover, Mixed Media

Cover Your Journal or other Notebook in Style! Workshop March 19

The more I make these samples the more ideas I get for using them.  Right now I’m working on a cute cover for a collection of recipes.  Also in the works is a cover that’s perfect for a knitting or crochet diary.  Keep records of what you made – type of yarn – needles used, and so on.

Here are a couple more that are suitable for just about any topic.  One of the benefits of these particular covers is that when your composition book is full you can slip it out and replace it with a brand new one.

Birds and ribbons

The cover shown above was made by Betsy Farwell and features a collage of nettiing with colorful ribbons and an unique toggle closure.Dream Cover

I made this cover from a colorful batik and embellished it with a collage of cheesecloth, lace, silk pod, and decorative hand and machine stitching.

Call Baron’s in Woodland Hills for details about the Journal Cover Workshop scheduled for March 19 from 6 until 9 PM at Baron’s Sewing Center in Woodland Hills.  Call 818-224-2746.