

Fiber Art Collage
Here’s how I approach the process. It’s art, after all, so feel free to bend, change or ignore any of the following steps.
Supplies: (read through the tute – it’ll make more sense)
- Blank Greeting Card (or medium of choice for mounting)
- Background Fabric – a scrap from your stash
- Batting or stabilizer to match size of background
- Various scraps of coordinating fabric, threads, fancy fibers, Angelina, cheesecloth, ribbons, other non-cotton scraps such as wool, silk, burlap etc.
- Glue stick – acid free
- Thread to sew together layers of the collage. Machine or embroidery thread
- Other embellishments of your choice: beads, charms etc.
Method:
- Determine the overall “feel” of the piece – Elegant? Playful? Modern? Romantic?
- Gather from your scrap bag and from your stash – pieces and bits that you think might belong in this piece (I often use color as my theme)

- Vary these design elements such as you would for any composition
- I think of these pieces as mini art quilts and assemble in layers
- Layer one – background (stabilized)
- Layer two – texture and color
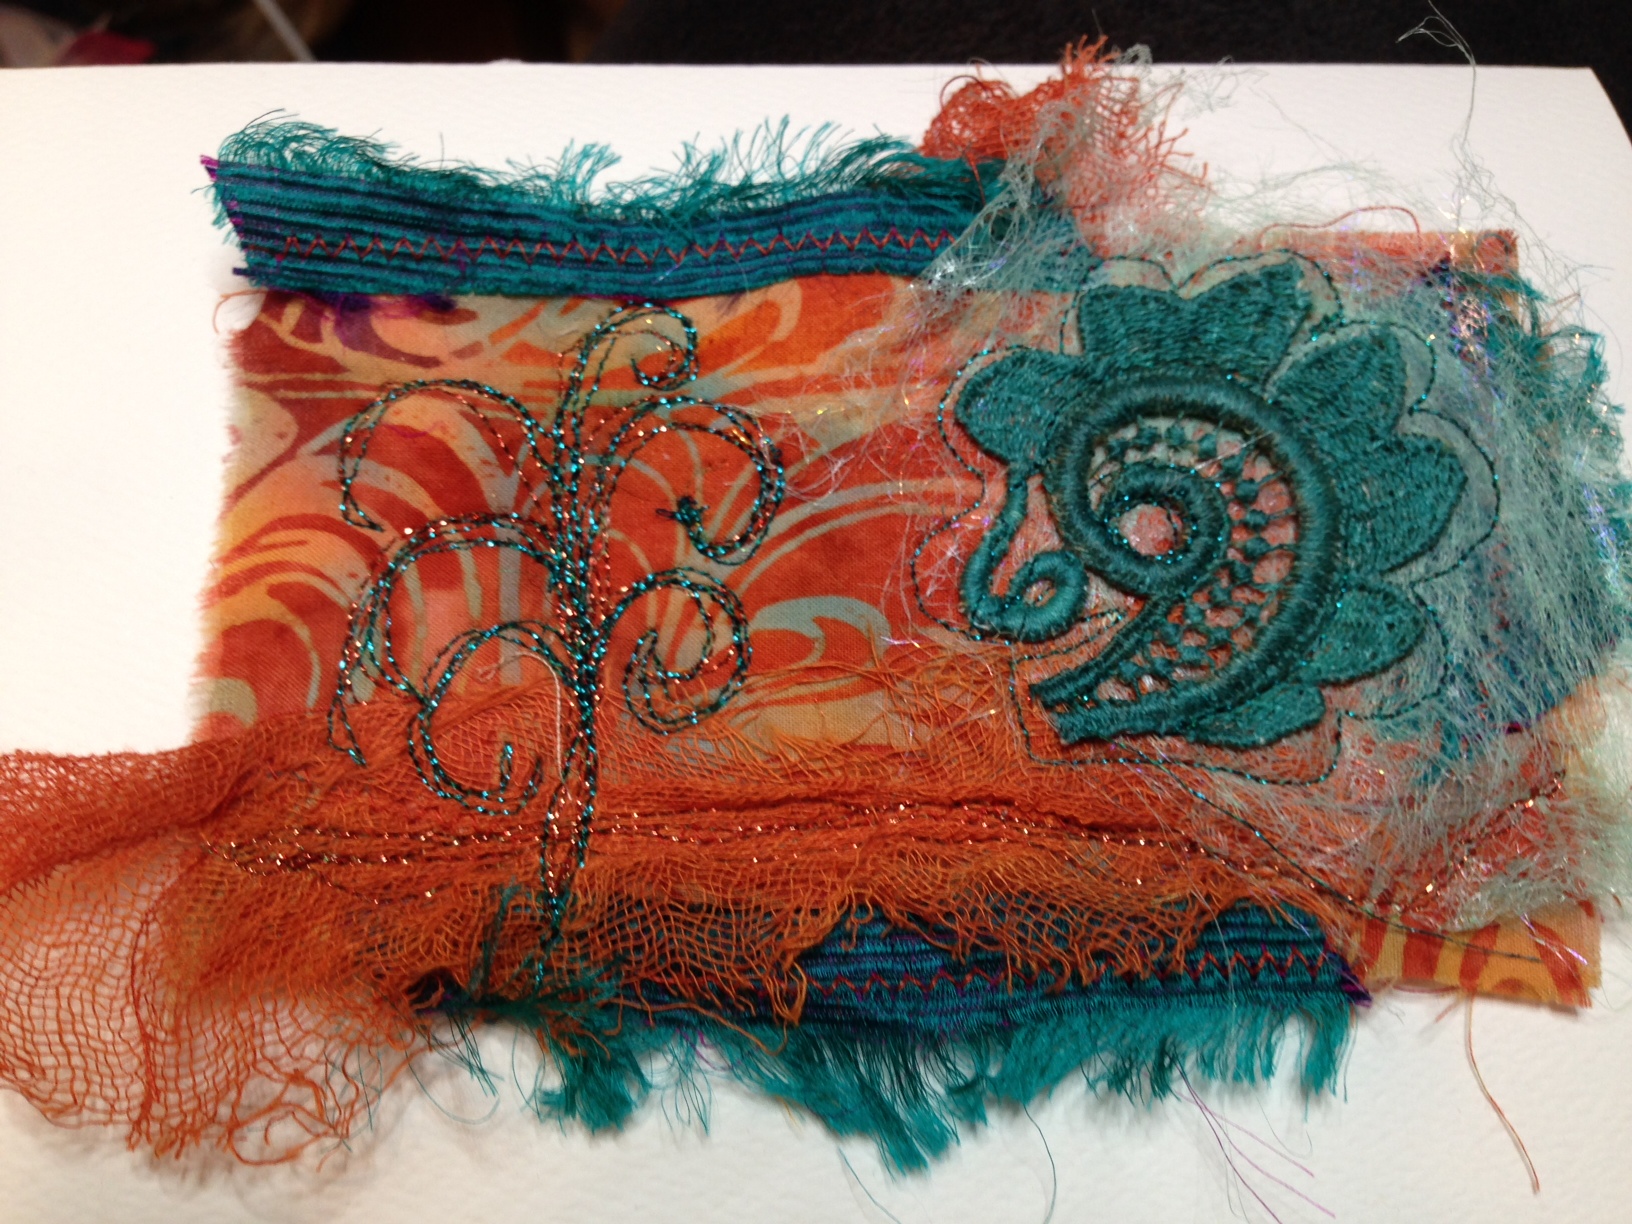
- Layer three – focal motif (just one example of my approach)
5. If preparing your mini fiber art collage for a greeting card – roughly cut your background fabric to measure at least one inch in from all four sides.

e.g. card is 5 by 7; background fabric no larger than 3 by 5
Your collage will be built on this background; may entirely cover it; may extend from any or all of the sides. If you prefer a frayed edge, tear your fabric instead of cutting.
6. Stabilize your background by whichever means you prefer (and happen to have on hand). I like to use something like Pellon Craft-fuse or Décor Bond. Or I may use regular cotton quilt batting. If you use batting, cover it with muslin so that it will adhere firmly to the card.

7. Add your texture and color elements into a design that pleases your eye. Pin first, then stitch to attach elements to background. Or just go for it; don’t overthink t!


8. Quilt by machine or by hand with thread of choice. Get crazy!

The angelina scrap was pinned to the piece after the stitching.
9. Add your final element(s). This may be a focal point OR it may be something (for example a circle of couching or beads) that enhances the focal element. In this case I isolated one element from some vintage lace trim and painted it.
10. Affix your completed piece to the front of the card with an acid free glue stick. (I like UHU best but also use Avery or others)
Have fun! I’d LOVE to see what you come up with. Send a pic to me – and I’ll post it!
And please let me know what you think of this tutorial… Thank you!
© Guila Greer 2014
This tutorial and all photos are the exclusive property of Guila Greer. It is for your personal use only. Please do not copy. Thank you very much for your understanding.
Yep! Definitely looks like turkey’s head!
So funny, hard to believe it’s just a coincidence.