Until just recently my sewing/art/studio shared space with our guest room. A lot of you know the drill: Company’s coming, start wheeling out the portable carts, last minute putting away of supplies (that you can’t find for weeks after your company goes home) and no access to your machine for a week. So along with my decision to go on “hiatus” from real estate I decided to convert my home office to a dedicated art studio. Number one requirement – a design wall – so sorely needed. Current design wall being the sliding doors of the guest room closet or a sheet on the floor for larger projects. The futon had to go and the ideal spot for it was my husband’s study. Of course he didn’t know anything about that but it didn’t take long to convince him that it was a wonderful idea :-). So I helped clear space for the futon and we proceeded to take it apart.
And that’s when the fun began.
Picture this – a queen size mattress – a relatively narrow door – 2 height challenged people
 So we each have an end of the mattress – John’s pulling I’m pushing and he starts doing some deep cleansing “labor” type breathing – saying “now push” breathe – Well I lost it – rolling on the floor lost it.
Shortly thereafter, with the mattress out of the room I left John to tackle the job of dismantling the frame. I couldn’t watch. It was like watching a scary movie.

 Next step was to turn that now beautifully empty wall into my dream design wall. I had purchased some fiber board and proceeded to put it up using double sided tape to adhere it to the wall.
Measure your space carefully before you buy the fiber board. It comes in a variety of sizes and I decided on the 30″ by 20″ size, easier to handle and more versatile so far as filling the space. You can get it in one of the chain crafts stores. I was lucky to find it on sale. You also want to note where your electrical outlets are so that you don’t cover them up. I started at the top because I didn’t want to run out of wall space with leftover fiber board to trim if possible. I figured that I would use the space at the top more readily than near the floor anyway.
.

My other purchase was a length of white cotton flannel yardage. I calculated the width of the board and multiplied by 2. Then I cut the yardage in half so that I ended up with 2 lengths the width of the design board. I used a staple gun to attach the flannel to the fiber board being careful to keep it taut and straight.
The last touch was to add a sturdy curtain rod across the top. This will be used to hang quilts for photographing. This design wall is now in constant use and I have found the hanging rod to be a necessary tool as well.
If you have any questions about how I did this please leave me a comment and I’ll do my best to provide an answer.


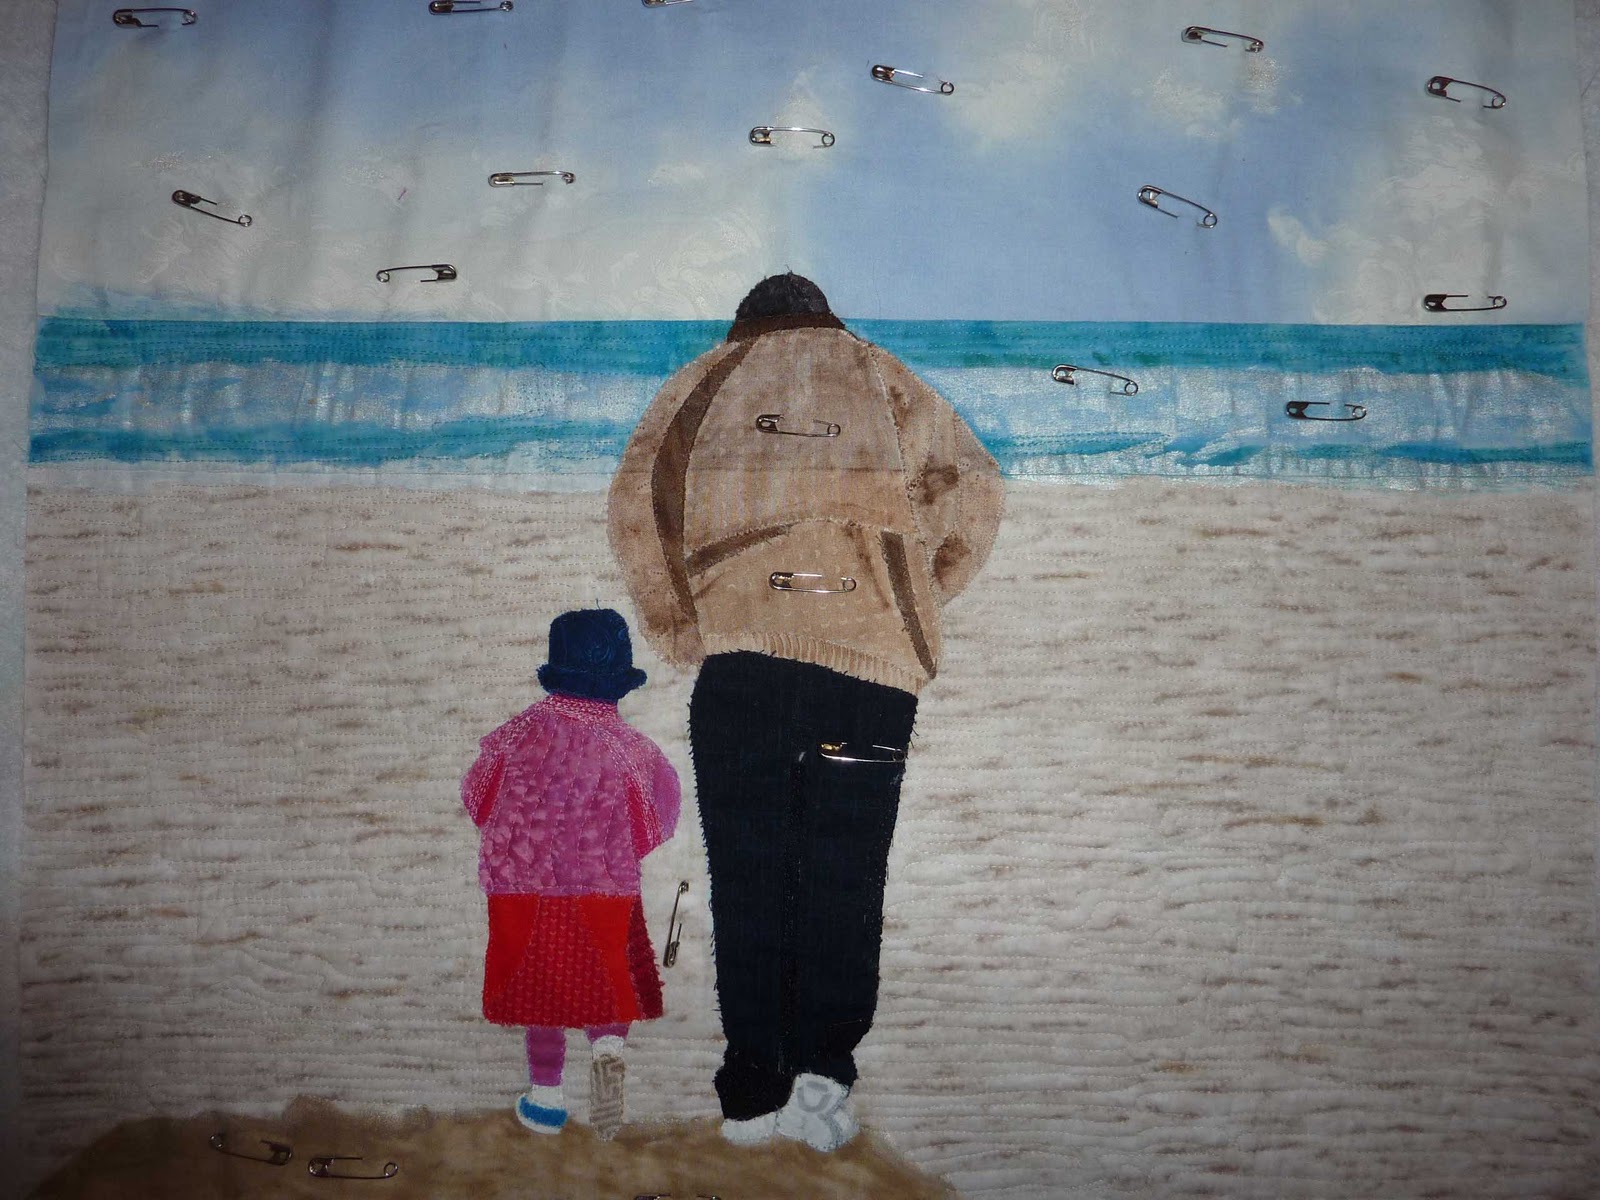
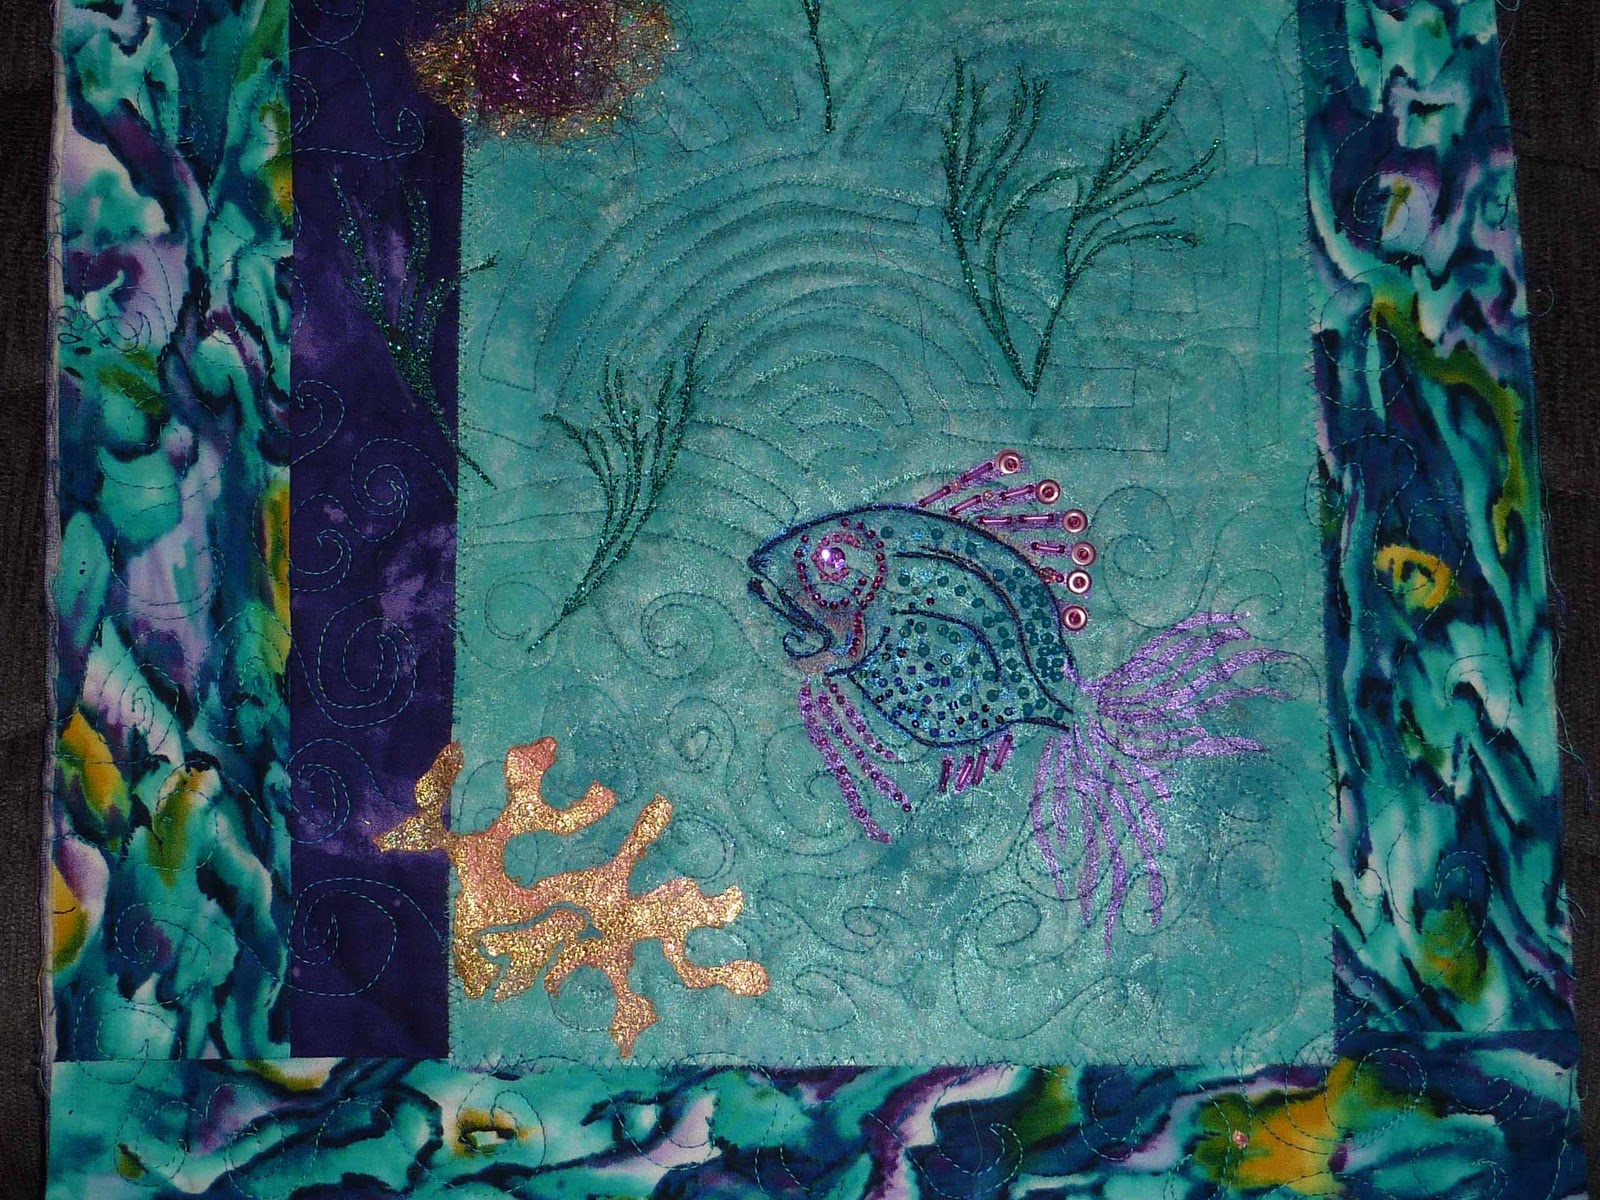
 Often. to get the look that I’m after for an art piece, I have to dye my own fabric. Now, that’s not something that I see an a hardship – although it is a lot of work: messy work. Especially now that I have my own studio with a SINK!! And there was a reason I wanted to leave the concrete floors “as-is” during the garage conversion.